
Oh My Terminal
The ability to prioritize time and energy dictates your ability to execute tasks efficiently. When it comes to being a full stack developer, you can stand out more easily if you just develop the ability to be productive and efficient when working towards your goals, rather than looking and feeling busy and out of time. Use your headspace to work smarter not harder. When I reach in my tool bag to build a data product, I tend to choose tools that leave more of my headspace to focus on developing the product and not making my syntax, IDE, and workflow functional. Outside the language you develop in, there are three essential things you need to be a full stack developer:
- Shell
- IDE
- Text Editor
This article will focus on making your shell work for you using a combination of tools:
- ZSH
- It’s a shell like bash, but if you haven’t tried it then you don’t know what you are missing. Just trust me on this. README
- There are too many features to mention, but if you can’t just trust me then these are some great ones I would highlight:
Automatic cd: Just type the name of the directory
Recursive path expansion: For example “/u/lo/b” expands to “/usr/local/bin”
Spelling correction and approximate completion: If you make a minor mistake typing a directory name, ZSH will fix it for you
Plugin and theme support: ZSH includes many different plugin frameworks
- Changing Terminal Theme and Font
- Oh My ZSH
- Oh My Zsh will not make you a 10x developer…but you may feel like one.
- Plugins
- Oh My Zsh plugins allow you to add varied functionality to your shell just by enabling them. There are tons of options found here
- Powerlevel9k

I know that’s a lot to throw at you, but here is the skinny. With a ZSH shell you can install an open source, community-driven framework for managing your zsh configuration called Oh My Zsh which uses plugins that perform all kinds of cool things that make your life easier and are stylized in a format that is aesthetically pleasing and functional using Powerlevel9k to make your prompt more effective and helpful. The original inspiration for this project can be found here, but to be honest I did not find a single guide that got me to a cohesive end product that I would consider worthwhile. I learned a lot through all that pain and if you’d like to become a kindred spirit here is a list of sources.
- https://www.smashingmagazine.com/2015/07/become-command-line-power-user-oh-my-zsh-z/
- https://www.howtoforge.com/tutorial/how-to-setup-zsh-and-oh-my-zsh-on-linux/
- https://www.howtogeek.com/362409/what-is-zsh-and-why-should-you-use-it-instead-of-bash/
- https://www.freecodecamp.org/news/how-to-configure-your-macos-terminal-with-zsh-like-a-pro-c0ab3f3c1156/
- https://medium.com/swlh/power-up-your-terminal-using-oh-my-zsh-iterm2-c5a03f73a9fb
- https://www.sitepoint.com/zsh-tips-tricks/
- https://sourabhbajaj.com/mac-setup/iTerm/zsh.html
…
Yeah there is just way too many guides out there, but to get an awesome terminal and if you largely don’t care how it works then follow this guide. It has all the features we would want to implement with the bare essential explanation as to how it works. Here is a demo of what your terminal prompt will look like if you follow their guide:

That is pretty great, but in an attempt to be a cornucopia of everything I have learned in this space dilluted down to the essentials, I invite you to follow along with what is sure to be one of my longest posts ever.
Install ZSH
Ok so this one should go quick. If you are coming from MacOS and you have a recent install of Catalina or newer OS (10.15 or later I think sue me if I’m wrong) then you already have ZSH. Congrats you can skip this part. If not then you need to know what shell you are using.
This is what the default bash profile in terminal looks like.

On MacOS
Just use brew: ```shell brew install zsh ``` or read the instructions [here](https://github.com/zsh-users/zsh/blob/master/INSTALL)
On a Raspberry Pi and Some Other Linux OS
```shell sudo apt-get update && sudo apt-get upgrade sudo apt-get install git zsh ``` I'm going to assume if you are using a Linux machine that doesn't manage software with apt-get you know what you are doing enough to not need me to write out a solution for you.
At the end it should look like this when you launch Terminal.

Change Shell to ZSH
If you look up "Change shell from bash to zsh" you will find something like below:
chsh -s /bin/zsh
That is almost always the path to your zsh install, and you can verify it by running:
echo $(which zsh)
However, if that works why not just run the following:
chsh -s $(which zsh)
Changing Terminal Theme and Font
This part is completely optional, but I think it makes for a better experience. Essentially, we are going to install a Terminal theme and then a new font to use. This is probably the most concise guide I used, but I did deviate from those instructions a little.
Download and Install A Cool Theme
You can download various Themes (.terminal files) but we are going to install a solarized dark theme from this git repo. You can tell a lot of thought went into the design of this theme in terms of enhancing the user experience. I encourage you to read it
-
Download the repository
git clone git://github.com/altercation/solarized.git -
Navigate to the solarized repo you just downloaded and find the
Solarized Dark ansi.terminalfile. If you cloned it to your user directory you will find it here:~/solarized/osx-terminal.app-colors-solarized/Solarized Dark ansi.terminalInstall it by opening the theme in Terminal.
right click > open with > Terminal
The color is pretty good by default, but I found it hard to see exactly what I was highlighting when I needed to copy and paste something. I recommend you set it up like I have below with a terminal window open and some text highlighting it so that you can hone in a color that contrasts the background but doesn’t obfuscate the text being highlighted. To fix this open the terminal preferences, click on profiles, and edit the opacity of the Display Ansi Colors:

Install An Awesome Font
There are various fonts you can install here and a couple of the guides I linked to will you have you install powerline, but I am going to go with nerd-fonts because of its installation options I can keep from bulking up the file system on my machine. This is done by running the following two commands:
brew tap homebrew/cask-fonts
brew install --cask font-hack-nerd-font
Once that is done I click change and select Hack Nerd Font font size 12.

It’s incredible how little changes like color and fonts will dramatically improve the user experience.

Oh My ZSH
Oh My Zsh is an open source, community-driven framework for managing your zsh configuration. Which sounds boring, but it is a gamechanger I promise. It allows you to utilize hundreds of powerful plugins and beautiful themes to take automate much of the typing you do in your command prompt and making you much more efficeint completing common shell tasks. Plus it is really easy to install:
Oh My Zsh is installed by running one of the following commands in your terminal. You can install this via the command-line with either curl, wget or another similar tool.
| Method | Command |
|---|---|
| curl | sh -c "$(curl -fsSL https://raw.githubusercontent.com/ohmyzsh/ohmyzsh/master/tools/install.sh)" |
| wget | sh -c "$(wget -O- https://raw.githubusercontent.com/ohmyzsh/ohmyzsh/master/tools/install.sh)" |
| fetch | sh -c "$(fetch -o - https://raw.githubusercontent.com/ohmyzsh/ohmyzsh/master/tools/install.sh)" |

Straight from the docs
Oh My Zsh comes with a shitload of plugins for you to take advantage of. You can take a look in the plugins directory and/or the wiki to see what’s currently available.
Enabling Plugins
Once you spot a plugin (or several) that you’d like to use with Oh My Zsh, you’ll need to enable them in the .zshrc file. You’ll find the zshrc file in your $HOME directory. Open it with your favorite text editor and you’ll see a spot to list all the plugins you want to load.
vi ~/.zshrc
For example, this might begin to look like this:
plugins=(
  git
  bundler
  dotenv
  osx
  rake
  rbenv
  ruby
)
Note that the plugins are separated by whitespace (spaces, tabs, new lines…). Do not use commas between them or it will break.
Using Plugins
Each plugin includes a README, documenting it. This README should show the aliases (if the plugin adds any) and extra goodies that are included in that particular plugin.
Plugins
Oh hey, you back already? Anyways plugins will make your life much easier and you should consider what will be beneficial to your workflow and the operating system you are utilizing. Here is a repository of awesome plugins you should consider, but remember try to only keep the ones you will need. Here is what I would add as a minimum:
plugins=(
  colorls
  git
  colored-man-pages
  colorize
  pip
  python
  brew
  osx
  zsh-syntax-highlighting
  zsh-autosuggestions
)
To do this you have to edit ~/.zshrc exactly how it says above, and then you have to follow the installation instructions for all the plugins that aren’t automatically installed with Oh My Zsh. Such as colorls, zsh-syntax-highlighting, and zsh-autosuggestions.
colorls
gem install colorls
Note: You will have to have Ruby installed. You can get more detailed instructions here, and I followed the recommended configuration found here and added
alias lc='colorls -lA --sd'
Syntax Highlighting and Autosuggestions
Fortunately zsh-syntax-highlighting and zsh-autosuggestions can be installed using brew.
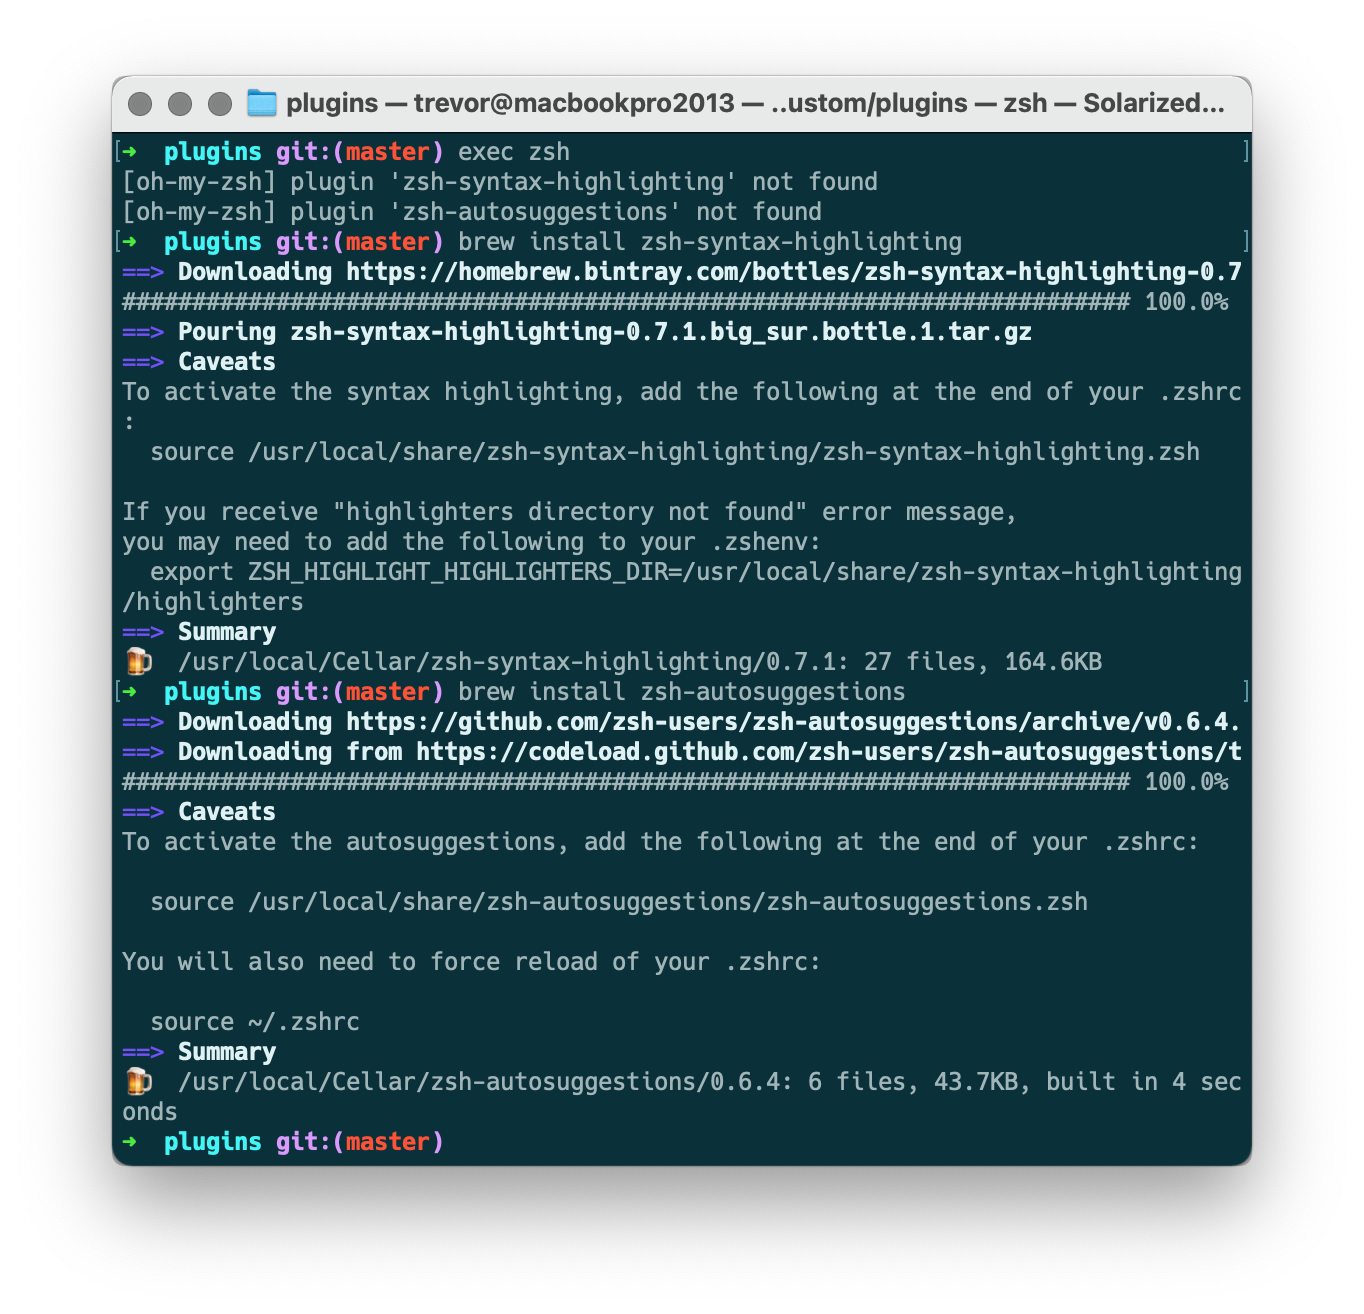
As you can see you need to run:
brew install zsh-syntax-highlighting
brew install zsh-autosuggestions
then add the path of your installation for each at the end of your .zshrc, and then source your .zshrc for those changes to take effect using source ~/.zshrc. I would recommend sourcing plugins like so at the end of your .zshrc rather than adding the full path as shown in the picture above:
source $(brew --prefix)/share/zsh-syntax-highlighting/zsh-syntax-highlighting.zsh
source $(brew --prefix)/share/zsh-autosuggestions/zsh-autosuggestions.zsh
This means you cannot put zsh-syntax-highlighting and zsh-autosuggestions in your plugins declaration, but the benefit is that brew is managing these installations, insulating the plugins from changes in your zsh setup. However, it may be confusing debugging issues in the future. So, to each his own.
Totally Optional “But You Should DO IT!!” Next Step
If you want to take your command line habits to a next level, I’d recommend installing a general purpose command-line fuzzy finder. fzf is just that, a general purpose command-line fuzzy finder. This doesn’t sound very descriptive or attractive for those who are hearing about it for the first time, but it will enable you start effortlessly searching files like a pro. Learn less known features, like changing directory, searching through a command history, looking up the host name to SSH into, killing a process, having instant file’s preview with syntax highlighting, and more _check out the demo here. Here is a good breakdown of the abilities featured in the demo.

*“fzf” as an interactive unix filter*
Essentially, it supercharges and wises up your command line experience. So, review the materials above and join the club it’s great. Here is the documentation I found for installing via brew.
brew install fzf
You will see something like the following:
==> Downloading https://homebrew.bintray.com/bottles/fzf-0.26.0.big_sur.bottle.tar.gz
==> Downloading from https://d29vzk4ow07wi7.cloudfront.net/b711f6a7672111cfe55bdf2ff56182eece3362a34745700bf37082e6fdc43e46?response-content-di
######################################################################## 100.0%
==> Pouring fzf-0.26.0.big_sur.bottle.tar.gz
==> Caveats
To install useful keybindings and fuzzy completion:
  /usr/local/opt/fzf/install

To use fzf in Vim, add the following line to your .vimrc:
  set rtp+=/usr/local/opt/fzf
==> Summary
🍺  /usr/local/Cellar/fzf/0.26.0: 17 files, 2.8MB
For me as suggested above, running /usr/local/opt/fzf/install adds [ -f ~/.fzf.zsh ] && source ~/.fzf.zsh to the end of your .zshrc and .bashrc configuration profiles. Restarting my shell and reloading the config file. Gives me some great interactivity which you can see here (side note: update your brew packages and push to GitHub more often)

Unfortunately, my terminalizer did not render all the styling and fonts we installed earlier in the article, but at this point your prompt should look something like this:

One final plug for fzf from the article mentioned above:
BTW, appreciate how superior Unix philosophy is. fzf is a great example of a program that adheres to these principles.
- let the program do one thing and do it well (single responsibility principle)
- make it abstract enough to be agnostic of irrelevant details or data types
- compose separate individual programs using standard well-defined interfaces.
Stick with those principles in your software development career. Knowing fundamental principles that stand behind the rapid birth and death of multiple tools, languages, and frameworks out there is what differentiates professional developers from amateurs.
Powerlevel9k
Ok I spent the better part of four hours trying to peice together all the sources I used to style my shell with Powerlevel9k. I couldn’t find the guide I used to build my own custom prompt segment, but you should not get to affixed on the theme because you can waste tons of hours. Build something that effectively gives you the information you need.
Powerlevel9k installation here
The method I used was to clone the repo
git clone https://github.com/bhilburn/powerlevel9k.git ~/.oh-my-zsh/custom/themes/powerlevel9k
then set the ZSH_THEME in our .zshrc to ZSH_THEME="powerlevel9k/powerlevel9k".
That looks fine, but literally every aspect of this is customizable, and you need to consider how each change makes the most of the plugins you are utilizing to make you a more productive developer. Here is what I would consider an introduction to customizing your command prompt. Essentially, just add the following to your .zshrc.
# Set list of themes to pick from when loading at random
# Setting this variable when ZSH_THEME=random will cause zsh to load
# a theme from this variable instead of looking in $ZSH/themes/
# If set to an empty array, this variable will have no effect.
# ZSH_THEME_RANDOM_CANDIDATES=( "robbyrussell" "agnoster" )
ZSH_THEME="powerlevel9k/powerlevel9k"
POWERLEVEL9K_MODE="nerdfont-complete"
POWERLEVEL9K_DISABLE_RPROMPT=true
POWERLEVEL9K_PROMPT_ON_NEWLINE=true
POWERLEVEL9K_MULTILINE_LAST_PROMPT_PREFIX="▶ "
POWERLEVEL9K_MULTILINE_FIRST_PROMPT_PREFIX=""
POWERLEVEL9K_LEFT_PROMPT_ELEMENTS=(os_icon context dir vcs)
# Search for your OS icon > https://www.nerdfonts.com/cheat-sheet
POWERLEVEL9K_OS_ICON="echo "
POWERLEVEL9K_OS_ICON_BACKGROUND=069
POWERLEVEL9K_OS_ICON_FOREGROUND=015
I’d recommend this article for learning how to customize things further, but the main documentation provides a decent base as to what is possible and common issues.
After a few days of tinkering, and a year of just benefitting, here is my final terminal experience:

There is still a number of things I would change about this prompt, but largely speaking I have been almost entirely happy with this experience for well over a year now. Here is my .zshrc:
# WARNING! Your terminal appears to support fewer than 256 colors!
# If your terminal supports 256 colors, please export the appropriate environment variable
# _before_ loading this theme in your ~/.zshrc. In most terminal emulators, putting
# export TERM="xterm-256color" at the top of your ~/.zshrc is sufficient.
export TERM="xterm-256color"
# If you come from bash you might have to change your $PATH.
# export PATH=$HOME/bin:/usr/local/bin:$PATH
# Path to your oh-my-zsh installation.
export ZSH="/Users/trevor/.oh-my-zsh"
# Set name of the theme to load --- if set to "random", it will
# load a random theme each time oh-my-zsh is loaded, in which case,
# to know which specific one was loaded, run: echo $RANDOM_THEME
# See https://github.com/ohmyzsh/ohmyzsh/wiki/Themes
# ZSH_THEME="robbyrussell"
# Set list of themes to pick from when loading at random
# Setting this variable when ZSH_THEME=random will cause zsh to load
# a theme from this variable instead of looking in $ZSH/themes/
# If set to an empty array, this variable will have no effect.
# ZSH_THEME_RANDOM_CANDIDATES=( "robbyrussell" "agnoster" )
###############################################################################
# Simple Powerlevel 9k Settings
###############################################################################
# ZSH_THEME="powerlevel9k/powerlevel9k"
# POWERLEVEL9K_MODE="nerdfont-complete"
#
# POWERLEVEL9K_DISABLE_RPROMPT=true
# POWERLEVEL9K_PROMPT_ON_NEWLINE=true
# POWERLEVEL9K_MULTILINE_LAST_PROMPT_PREFIX="▶ "
# POWERLEVEL9K_MULTILINE_FIRST_PROMPT_PREFIX=""
#
# POWERLEVEL9K_LEFT_PROMPT_ELEMENTS=(os_icon context dir vcs)
#
# # Search for your OS icon > https://www.nerdfonts.com/cheat-sheet
# POWERLEVEL9K_OS_ICON="echo "
# POWERLEVEL9K_OS_ICON_BACKGROUND=069
# POWERLEVEL9K_OS_ICON_FOREGROUND=015
###############################################################################
# Powerlevel 9k Settings - https://github.com/bhilburn/powerlevel9k
###############################################################################
# Set username to consider a default context, which by default will not be shown.
# https://github.com/bhilburn/powerlevel9k/blob/next/segments/context/README.md
## How I fixed context to display my username only
# https://github.com/Powerlevel9k/powerlevel9k/issues/996#issuecomment-425394018
# DEFAULT_USER='trevor'
POWERLEVEL9K_ALWAYS_SHOW_USER=true
# Set P9KGT background color, either 'light' or 'dark' (this should match the GNOME Terminal's theme).
P9KGT_BACKGROUND='dark'
if [[ $P9KGT_BACKGROUND != 'light' ]] && [[ $P9KGT_BACKGROUND != 'dark' ]]
then
P9KGT_ERROR=true
echo "P9KGT error: variable 'P9KGT_BACKGROUND' should be either 'light' or 'dark'"
fi
# Set P9KGT color scheme, either 'light', 'dark' or 'bright' (choose by preference).
P9KGT_COLORS='bright'
if [[ $P9KGT_COLORS != 'light' ]] && [[ $P9KGT_COLORS != 'dark' ]] && [[ $P9KGT_COLORS != 'bright' ]]
then
P9KGT_ERROR=true
echo "P9KGT error: variable 'P9KGT_COLORS' should be either 'light', 'dark' or 'bright'"
fi
# Set P9KGT fonts mode, either 'default', 'awesome-fontconfig', 'awesome-mapped-fontconfig', 'awesome-patched', 'nerdfont-complete' or 'nerdfont-fontconfig'.
# https://github.com/bhilburn/powerlevel9k/wiki/About-Fonts
ZSH_THEME="powerlevel9k/powerlevel9k"
P9KGT_FONTS='nerdfont-complete'
if [[ $P9KGT_FONTS != 'default' ]] && [[ $P9KGT_FONTS != 'awesome-fontconfig' ]] && [[ $P9KGT_FONTS != 'awesome-mapped-fontconfig' ]] &&
[[ $P9KGT_FONTS != 'awesome-patched' ]] && [[ $P9KGT_FONTS != 'nerdfont-complete' ]] && [[ $P9KGT_FONTS != 'nerdfont-fontconfig' ]]
then
P9KGT_ERROR=true
echo "P9KGT error: variable 'P9KGT_FONTS' should be either 'default', 'awesome-fontconfig', 'awesome-mapped-fontconfig', 'awesome-patched', 'nerdfont-complete' or 'nerdfont-fontconfig'"
else
POWERLEVEL9K_MODE=$P9KGT_FONTS
fi
if [[ $P9KGT_ERROR != true ]]
then
# Set P9KGT background color
if [[ $P9KGT_BACKGROUND == 'light' ]]
then
# https://github.com/bhilburn/powerlevel9k/wiki/Stylizing-Your-Prompt#light-color-theme
POWERLEVEL9K_COLOR_SCHEME='light'
P9KGT_TERMINAL_BACKGROUND=231
elif [[ $P9KGT_BACKGROUND == 'dark' ]]
then
POWERLEVEL9K_COLOR_SCHEME='dark'
P9KGT_TERMINAL_BACKGROUND=236
fi
# Set P9KGT foreground colors
if [[ $P9KGT_COLORS == 'light' ]]
then
P9KGT_RED=009
P9KGT_GREEN=010
P9KGT_YELLOW=011
P9KGT_BLUE=012
elif [[ $P9KGT_COLORS == 'dark' ]]
then
P9KGT_RED=001
P9KGT_GREEN=002
P9KGT_YELLOW=003
P9KGT_BLUE=004
elif [[ $P9KGT_COLORS == 'bright' ]]
then
P9KGT_RED=196
#P9KGT_GREEN=148
P9KGT_GREEN=154
P9KGT_YELLOW=220
P9KGT_BLUE=075
fi
# Customize prompt
# Make the Segments display on one line and the command prompt and right prompt display on a newline
POWERLEVEL9K_PROMPT_ON_NEWLINE=true
POWERLEVEL9K_RPROMPT_ON_NEWLINE=true
# Adding a new line before each new command line
POWERLEVEL9K_PROMPT_ADD_NEWLINE=true
# https://github.com/bhilburn/powerlevel9k/tree/next#customizing-prompt-segments
POWERLEVEL9K_LEFT_PROMPT_ELEMENTS=(
os_icon context newline
dir_writable dir newline
vcs newline
anaconda
)
POWERLEVEL9K_RIGHT_PROMPT_ELEMENTS=(status root_indicator background_jobs)
# Set 'os_icon' segment to grey
POWERLEVEL9K_OS_ICON_BACKGROUND='240'
# Set 'context' segment colors
# https://github.com/bhilburn/powerlevel9k/blob/next/segments/context/README.md
POWERLEVEL9K_CONTEXT_TEMPLATE='%n'
POWERLEVEL9K_CONTEXT_DEFAULT_FOREGROUND='white'
# POWERLEVEL9K_CONTEXT_DEFAULT_FOREGROUND=$P9KGT_YELLOW
POWERLEVEL9K_CONTEXT_ROOT_FOREGROUND=$P9KGT_YELLOW
POWERLEVEL9K_CONTEXT_SUDO_FOREGROUND=$P9KGT_YELLOW
POWERLEVEL9K_CONTEXT_REMOTE_FOREGROUND=$P9KGT_YELLOW
POWERLEVEL9K_CONTEXT_REMOTE_SUDO_FOREGROUND=$P9KGT_YELLOW
POWERLEVEL9K_CONTEXT_DEFAULT_BACKGROUND=$P9KGT_TERMINAL_BACKGROUND
POWERLEVEL9K_CONTEXT_ROOT_BACKGROUND=$P9KGT_TERMINAL_BACKGROUND
POWERLEVEL9K_CONTEXT_SUDO_BACKGROUND=$P9KGT_TERMINAL_BACKGROUND
POWERLEVEL9K_CONTEXT_REMOTE_BACKGROUND=$P9KGT_TERMINAL_BACKGROUND
POWERLEVEL9K_CONTEXT_REMOTE_SUDO_BACKGROUND=$P9KGT_TERMINAL_BACKGROUND
# Set 'dir_writable' segment colors
# https://github.com/bhilburn/powerlevel9k/blob/next/segments/dir_writable/README.md
POWERLEVEL9K_DIR_WRITABLE_FORBIDDEN_FOREGROUND=$P9KGT_YELLOW
POWERLEVEL9K_DIR_WRITABLE_FORBIDDEN_BACKGROUND=$P9KGT_RED
# Set 'dir' segment colors
# https://github.com/bhilburn/powerlevel9k/blob/next/segments/dir/README.md
POWERLEVEL9K_SHORTEN_DIR_LENGTH=2
POWERLEVEL9K=truncate_beginning
POWERLEVEL9K_DIR_DEFAULT_FOREGROUND=$P9KGT_TERMINAL_BACKGROUND
POWERLEVEL9K_DIR_HOME_FOREGROUND=$P9KGT_TERMINAL_BACKGROUND
POWERLEVEL9K_DIR_HOME_SUBFOLDER_FOREGROUND=$P9KGT_TERMINAL_BACKGROUND
POWERLEVEL9K_DIR_ETC_FOREGROUND=$P9KGT_TERMINAL_BACKGROUND
POWERLEVEL9K_DIR_DEFAULT_BACKGROUND=$P9KGT_BLUE
POWERLEVEL9K_DIR_HOME_BACKGROUND=$P9KGT_BLUE
POWERLEVEL9K_DIR_HOME_SUBFOLDER_BACKGROUND=$P9KGT_BLUE
POWERLEVEL9K_DIR_ETC_BACKGROUND=$P9KGT_BLUE
# Set 'vcs' segment colors
# https://github.com/bhilburn/powerlevel9k/blob/next/segments/vcs/README.md
POWERLEVEL9K_VCS_CLEAN_FOREGROUND=$P9KGT_TERMINAL_BACKGROUND
POWERLEVEL9K_VCS_MODIFIED_FOREGROUND=$P9KGT_TERMINAL_BACKGROUND
POWERLEVEL9K_VCS_CLOBBERED_FOREGROUND=$P9KGT_TERMINAL_BACKGROUND
POWERLEVEL9K_VCS_UNTRACKED_FOREGROUND=$P9KGT_TERMINAL_BACKGROUND
POWERLEVEL9K_VCS_CLEAN_BACKGROUND=$P9KGT_GREEN
POWERLEVEL9K_VCS_MODIFIED_BACKGROUND=$P9KGT_YELLOW
POWERLEVEL9K_VCS_CLOBBERED_BACKGROUND=$P9KGT_RED
POWERLEVEL9K_VCS_UNTRACKED_BACKGROUND=$P9KGT_GREEN
POWERLEVEL9K_VCS_UNTRACKED_ICON=●
POWERLEVEL9K_VCS_UNSTAGED_ICON=±
POWERLEVEL9K_VCS_INCOMING_CHANGES_ICON=↓
POWERLEVEL9K_VCS_OUTGOING_CHANGES_ICON=↑
POWERLEVEL9K_VCS_COMMIT_ICON=' '
# Set 'status' segment colors
# https://github.com/bhilburn/powerlevel9k/blob/next/segments/status/README.md
POWERLEVEL9K_STATUS_CROSS=true
POWERLEVEL9K_STATUS_OK_FOREGROUND=$P9KGT_GREEN
POWERLEVEL9K_STATUS_ERROR_FOREGROUND=$P9KGT_RED
POWERLEVEL9K_STATUS_OK_BACKGROUND=$P9KGT_TERMINAL_BACKGROUND
POWERLEVEL9K_STATUS_ERROR_BACKGROUND=$P9KGT_TERMINAL_BACKGROUND
# Set 'root_indicator' segment colors
# https://github.com/bhilburn/powerlevel9k/blob/next/segments/root_indicator/README.md
POWERLEVEL9K_ROOT_INDICATOR_FOREGROUND=$P9KGT_YELLOW
POWERLEVEL9K_ROOT_INDICATOR_BACKGROUND=$P9KGT_TERMINAL_BACKGROUND
# Set 'background_jobs' segment colors
# https://github.com/bhilburn/powerlevel9k/blob/next/segments/background_jobs/README.md
POWERLEVEL9K_BACKGROUND_JOBS_FOREGROUND=$P9KGT_TERMINAL_BACKGROUND
POWERLEVEL9K_BACKGROUND_JOBS_BACKGROUND=$P9KGT_YELLOW
# Set 'anaconda' segment
POWERLEVEL9K_ANACONDA_LEFT_DELIMITER=""
POWERLEVEL9K_ANACONDA_RIGHT_DELIMITER=""
POWERLEVEL9K_PYTHON_ICON=" Conda Env:"
POWERLEVEL9K_ANACONDA_BACKGROUND='darkgreen'
POWERLEVEL9K_ANACONDA_FOREGROUND='white'
fi
###############################################################################
# Uncomment the following line to use case-sensitive completion.
# CASE_SENSITIVE="true"
# Uncomment the following line to use hyphen-insensitive completion.
# Case-sensitive completion must be off. _ and - will be interchangeable.
# HYPHEN_INSENSITIVE="true"
# Uncomment the following line to disable bi-weekly auto-update checks.
# DISABLE_AUTO_UPDATE="true"
# Uncomment the following line to automatically update without prompting.
# DISABLE_UPDATE_PROMPT="true"
# Uncomment the following line to change how often to auto-update (in days).
# export UPDATE_ZSH_DAYS=13
# Uncomment the following line if pasting URLs and other text is messed up.
# DISABLE_MAGIC_FUNCTIONS="true"
# Uncomment the following line to disable colors in ls.
# DISABLE_LS_COLORS="true"
# Uncomment the following line to disable auto-setting terminal title.
# DISABLE_AUTO_TITLE="true"
# Uncomment the following line to enable command auto-correction.
# ENABLE_CORRECTION="true"
# Uncomment the following line to display red dots whilst waiting for completion.
# Caution: this setting can cause issues with multiline prompts (zsh 5.7.1 and newer seem to work)
# See https://github.com/ohmyzsh/ohmyzsh/issues/5765
# COMPLETION_WAITING_DOTS="true"
# Uncomment the following line if you want to disable marking untracked files
# under VCS as dirty. This makes repository status check for large repositories
# much, much faster.
# DISABLE_UNTRACKED_FILES_DIRTY="true"
# Uncomment the following line if you want to change the command execution time
# stamp shown in the history command output.
# You can set one of the optional three formats:
# "mm/dd/yyyy"|"dd.mm.yyyy"|"yyyy-mm-dd"
# or set a custom format using the strftime function format specifications,
# see 'man strftime' for details.
# HIST_STAMPS="mm/dd/yyyy"
# Would you like to use another custom folder than $ZSH/custom?
# ZSH_CUSTOM=/path/to/new-custom-folder
# Which plugins would you like to load?
# Standard plugins can be found in $ZSH/plugins/
# Custom plugins may be added to $ZSH_CUSTOM/plugins/
# Example format: plugins=(rails git textmate ruby lighthouse)
# Add wisely, as too many plugins slow down shell startup.
plugins=(
git
colored-man-pages
colorize
pip
python
brew
osx
)
source $ZSH/oh-my-zsh.sh
##################################################################
# User configuration
##################################################################
source $(brew --prefix)/share/zsh-syntax-highlighting/zsh-syntax-highlighting.zsh
source $(brew --prefix)/share/zsh-autosuggestions/zsh-autosuggestions.zsh
# source ~/powerlevel9k/powerlevel9k.zsh-theme
# export MANPATH="/usr/local/man:$MANPATH"
# You may need to manually set your language environment
# export LANG=en_US.UTF-8
# Preferred editor for local and remote sessions
# if [[ -n $SSH_CONNECTION ]]; then
# export EDITOR='vim'
# else
# export EDITOR='mvim'
# fi
# Compilation flags
# export ARCHFLAGS="-arch x86_64"
# Set personal aliases, overriding those provided by oh-my-zsh libs,
# plugins, and themes. Aliases can be placed here, though oh-my-zsh
# users are encouraged to define aliases within the ZSH_CUSTOM folder.
# For a full list of active aliases, run `alias`.
#
# Example aliases
# alias zshconfig="mate ~/.zshrc"
# alias ohmyzsh="mate ~/.oh-my-zsh"
alias lc='colorls -lA --sd'
# ------------------------------------------------------------------------------
# A whole host of things that get tacked on the end for various install purposes
# If you coming from bash you may want to source your bash profile otherwise some CL functionalities of things you have installed may not work anymore.
# source ~/.bash_profile
[ -f ~/.fzf.zsh ] && source ~/.fzf.zsh
export PATH="/usr/local/sbin:$PATH"
# >>> conda initialize >>>
# !! Contents within this block are managed by 'conda init' !!
__conda_setup="$('/usr/local/Caskroom/miniconda/base/bin/conda' 'shell.zsh' 'hook' 2> /dev/null)"
if [ $? -eq 0 ]; then
eval "$__conda_setup"
else
if [ -f "/usr/local/Caskroom/miniconda/base/etc/profile.d/conda.sh" ]; then
. "/usr/local/Caskroom/miniconda/base/etc/profile.d/conda.sh"
else
export PATH="/usr/local/Caskroom/miniconda/base/bin:$PATH"
fi
fi
unset __conda_setup
# <<< conda initialize <<<